How to upgrade Windows 10 to Windows 11
Just a couple of days left before the release of Windows 11, the next round of evolution of Microsoft`s operating systems. For the last 20 years I have been testing new versions of Windows and of course I could not deny myself the pleasure of trying Windows 11, and I can tell you, it did not disappoint me. In this article, I will show you how to update Windows 10 to Wiindows 11 or perform a clean install.
To update Windows 10 to Windows 11, you will need 2 hours to follow these steps:
Preparation
- Download utility
First of all, I recommend to download the official Microsoft utility for checking the possibility of updating the system to Windows 11. To install, just run the downloaded file and click on `Next` until the utility starts.
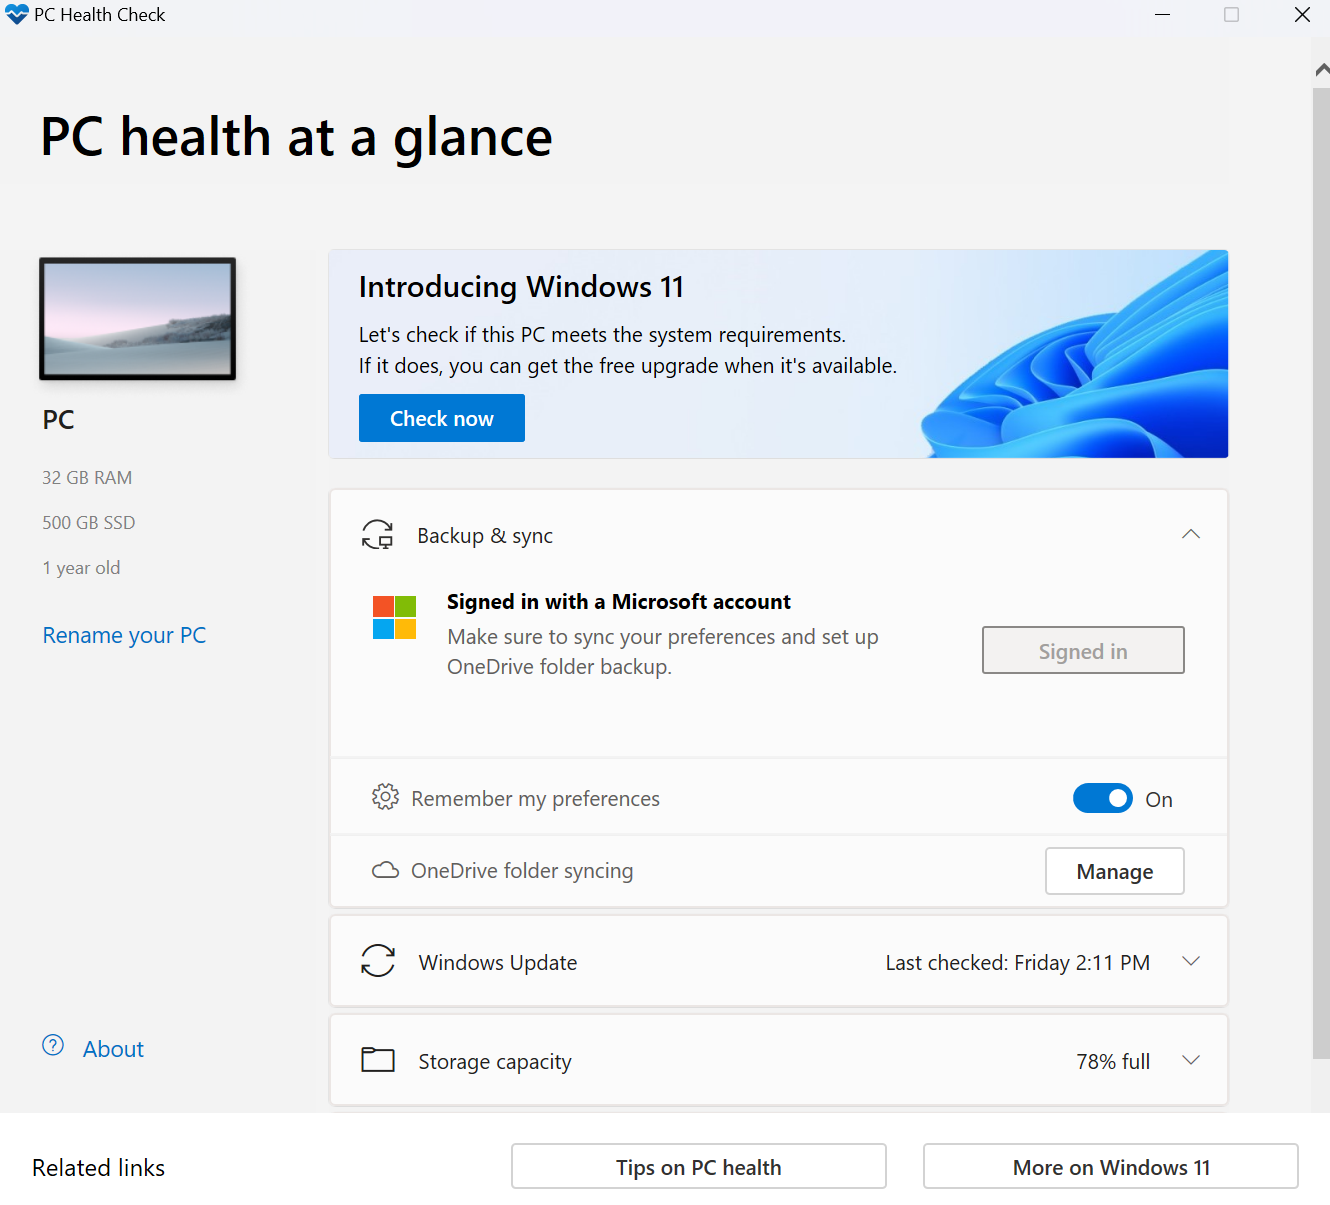
- Check update possibility
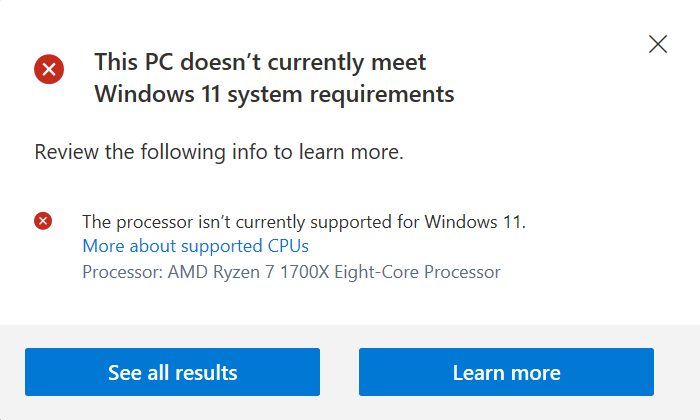
To check the possibility of updating the system, simply click `Check now`, and if your system is fully supported, you will see a corresponding message. In my case, the utility displays a message that the processor is too old and the update is not supported. But don`t be upset, because some concessions are being made for the Windows 11 pre-test participants and I was able to update to Windows 11 without any problems.
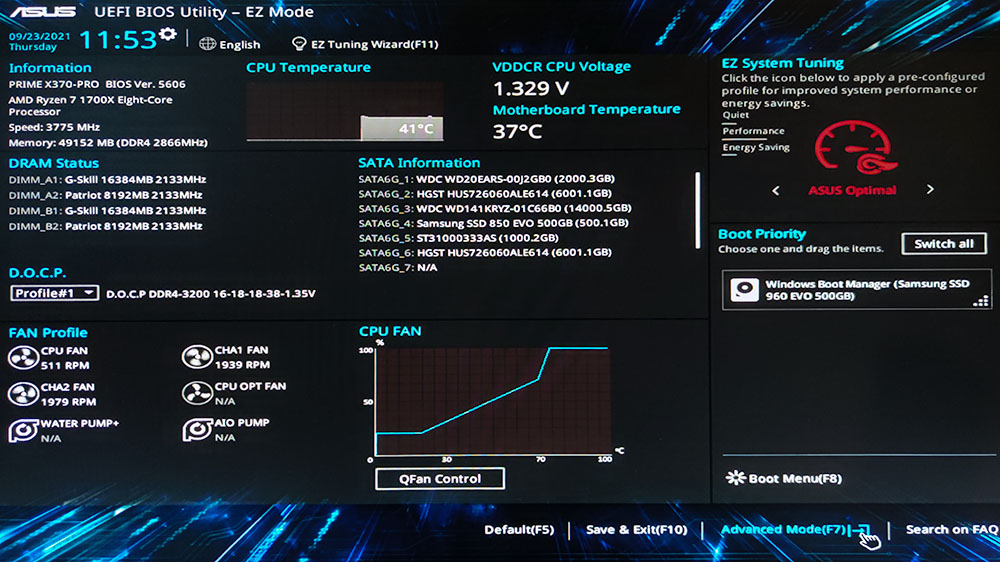
- Enter BIOS
You can see the inscription that the TPM (Trusted Platform Module) is not installed and / or not supported. As a rule, it is rarely where it is integrated into the motherboard, tk. it is more used in the server segment, but its emulation can and should be enabled in the BIOS. To get there, restart your computer and press F2 or Del many times. This is what the main BIOS page looks like. All bios are outwardly different, but the logical structure is approximately the same. I have been using Asus products for over 20 years and they have never let me down.
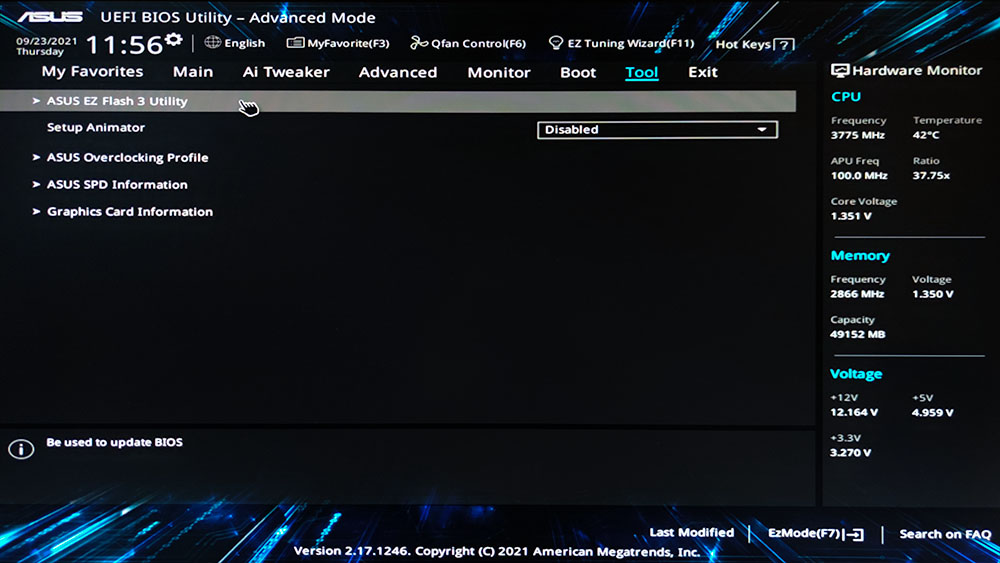
- Enter BIOS update utility
Many manufacturers have already released updated BIOS versions that make the necessary changes to the settings to fully support Windows 11. Also, the BIOS update brings support for new processors and fixes critical vulnerabilities. Therefore, it is recommended that you update the BIOS before manual configuration and to simplify the BIOS setup task to support Windows 11. It is recommended to do this only for experienced users and with stable electricity. turning off the lights during a BIOS update may render your computer inoperable and may require a visit to a service center to repair it. To do this, we need to go to the appropriate BIOS section (different manufacturers may call it differently).
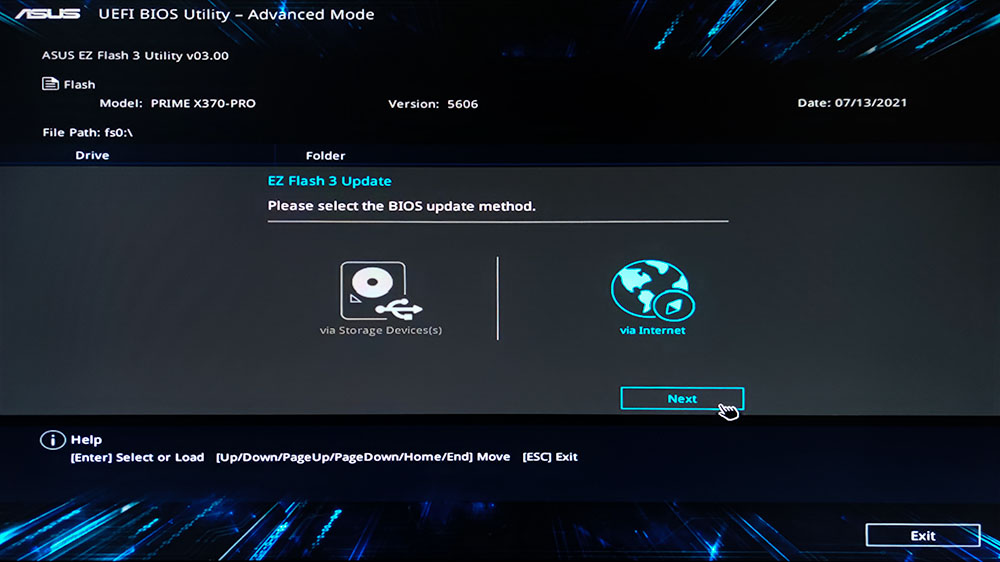
- Update BIOS via Internet
The easiest update option is to update over the Internet, but if you have a very old computer, it may not `see`` the new BIOS version. Therefore, you will need to download it manually from your motherboard`s support page on the manufacturer`s website. Often, the BIOS is packed in a zip archive, and in order for the BIOS update utility to `see` it, you will need to unpack it and save it to the root of one of the disks or to a USB flash drive. These steps are for even more advanced users who know what to do themselves, but here I will show you an easier way to update the BIOS.
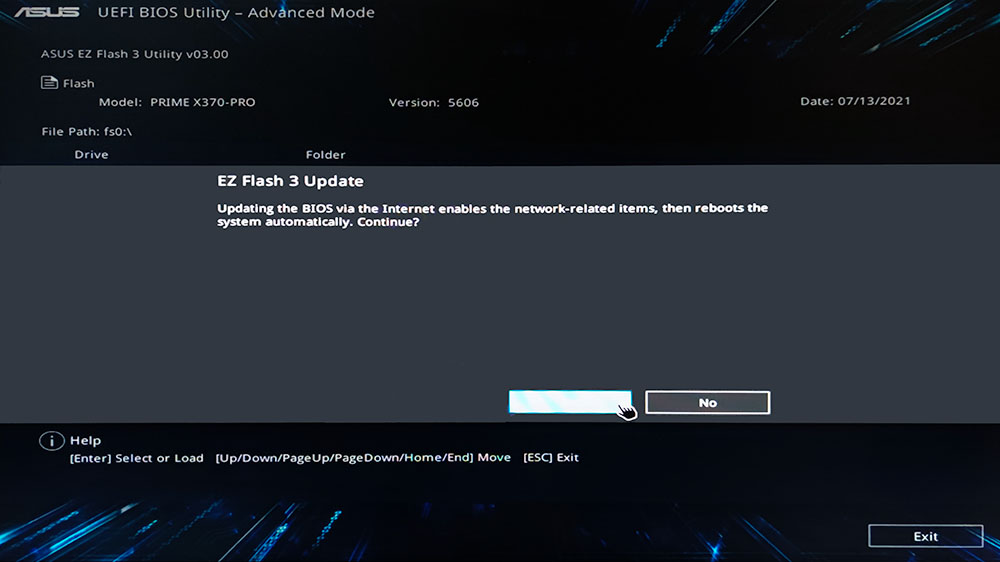
- Network enablement confirmation
To update over the network, you need to enable the built-in network, which the wizard suggests to us to do, after which the computer will be restarted.
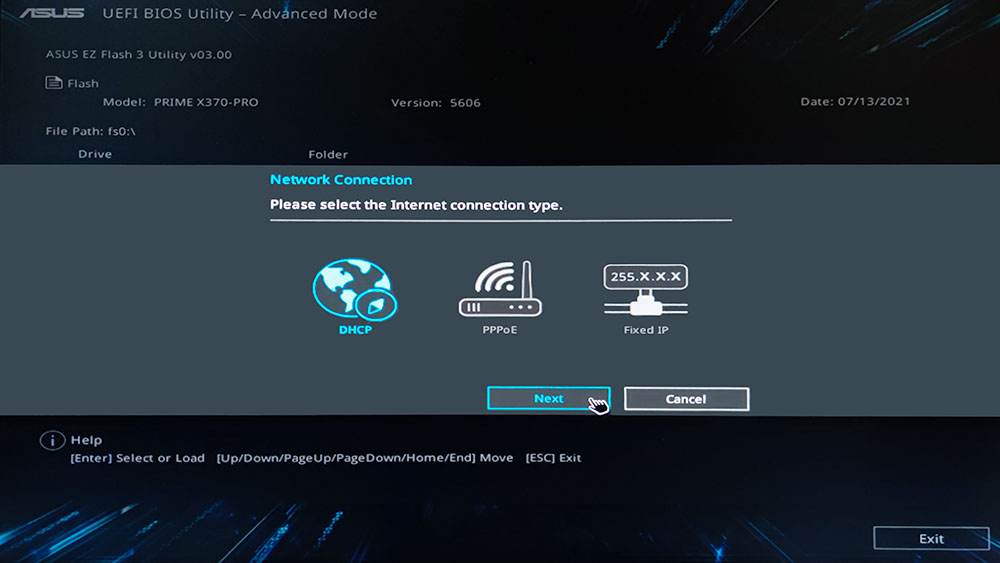
- Select connection type
If your computer is connected to a router (router) or directly to the Internet with a cable, then we select the first item for obtaining an address via DHCP. The other two items are intended for advanced users who can configure the properties of the Internet connection themselves, or manually download a new BIOS version. The update wizard is quite simple, it will download the new BIOS version from the manufacturer`s website and update the installed one. The computer will restart several times, so be patient and do not interrupt the process, it may take 5-10 minutes.
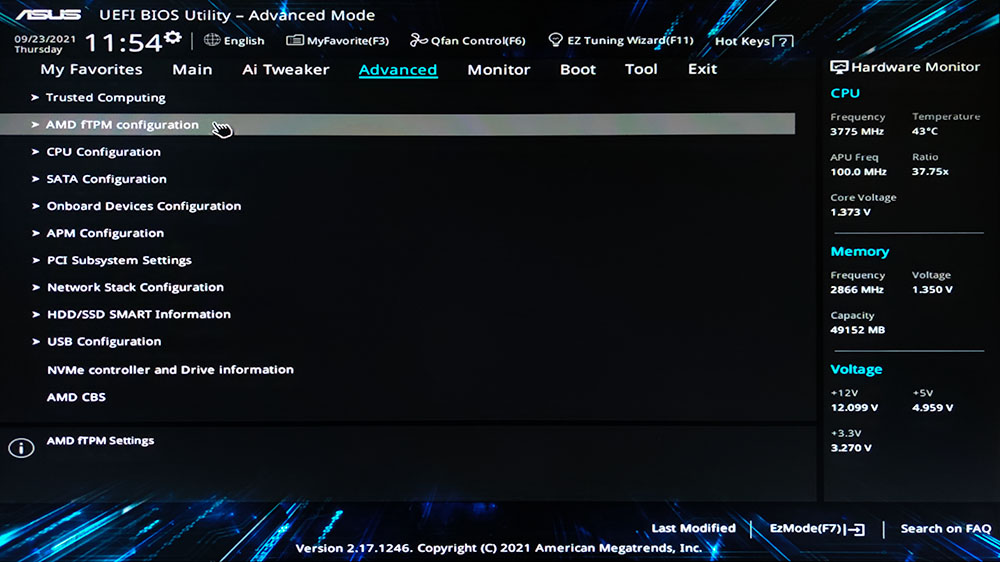
- Enter advanced mode
To configure additional parameters, we need to switch to Advanced Mode. If you have an AMD processor, then go to AMD fTPM Configuration, if Intel - look for a similar menu item.
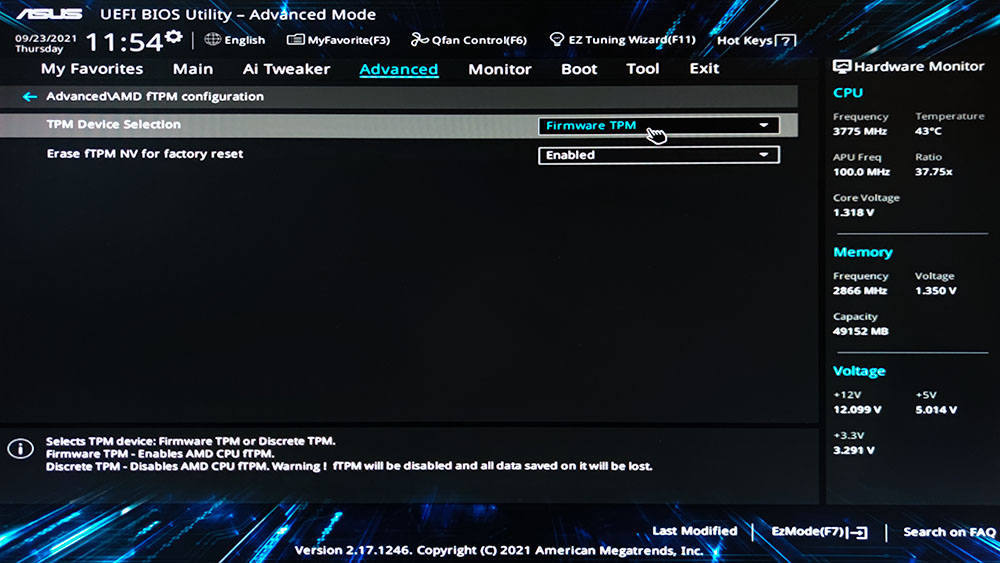
- Turn on TPM emulation
Enable software emulation of the TPM module by selecting the Firmware TPM value in the drop-down list of options.
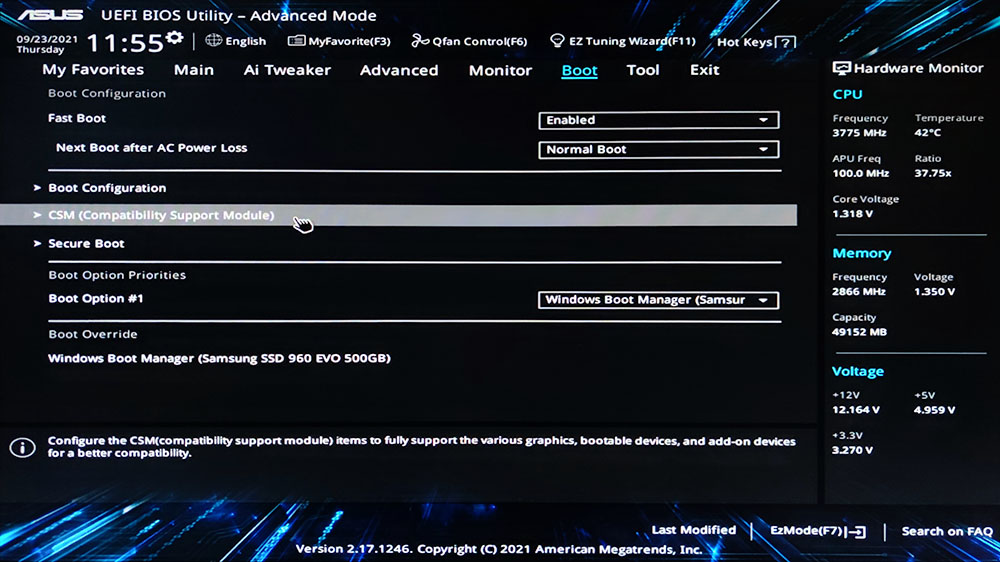
- Enter CSM configuration
Go to the Boot section in the top menu and then go to the CSM (Compatibility Support Module) item, the mode for setting compatibility with old OS.
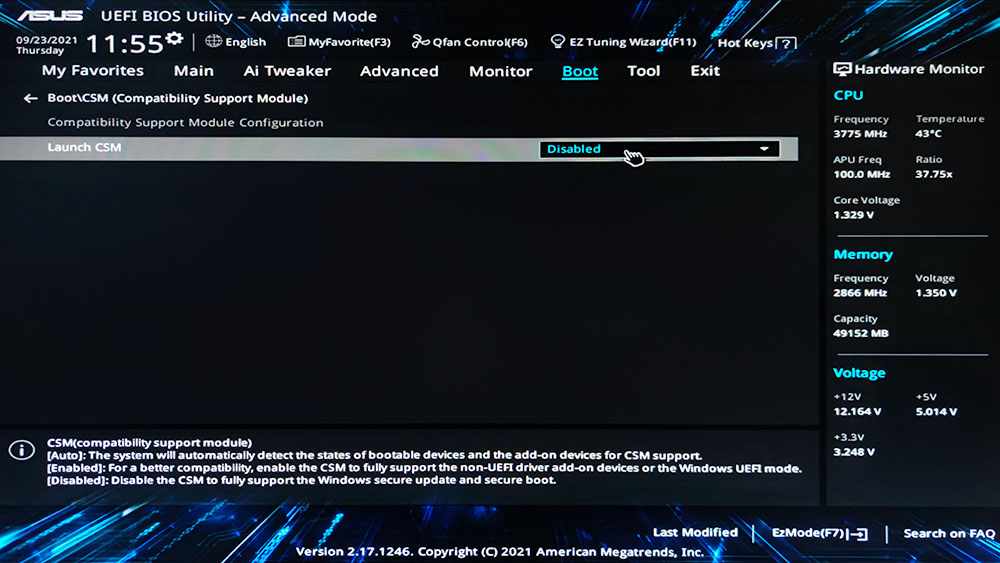
- Disable CSM launch
Since Windows 11 is Microsoft`s newest and most secure operating system, we can disable support for booting older operating systems.
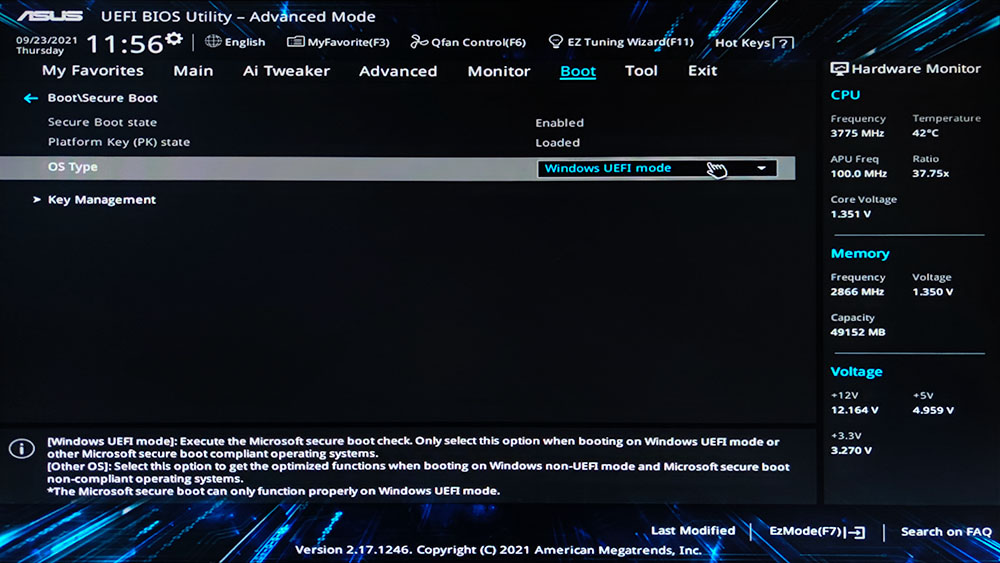
- Enable Secure Boot
Next, we exit this menu item and go to the Secure Boot item, where we need to specify the type of operating system and operating mode.