How to encrypt EBS volume to secure your data
If you're looking to secure your data on Amazon Web Services (AWS), encrypting your Elastic Block Store (EBS) volumes is a must. Encryption provides an extra layer of protection to your data, ensuring that even in the unlikely event of a data breach, your sensitive information remains secure. This guide will take you through the process of encrypting an EBS volume, from start to finish. By following these simple steps, you'll have peace of mind knowing your data is protected by industry-standard encryption methods.
2026 note: many AWS accounts now use EBS encryption by default for new volumes, but you still cannot directly encrypt an existing unencrypted volume in place. The practical path is still to create a snapshot, create or copy it as encrypted with AWS KMS, then attach a replacement encrypted volume.
You will need 1 hour(depends on your volume size) to follow these steps:
- Go to https://console.aws.amazon.com/ec2 and navigate to instances
Stop instance which volume you want to encrypt 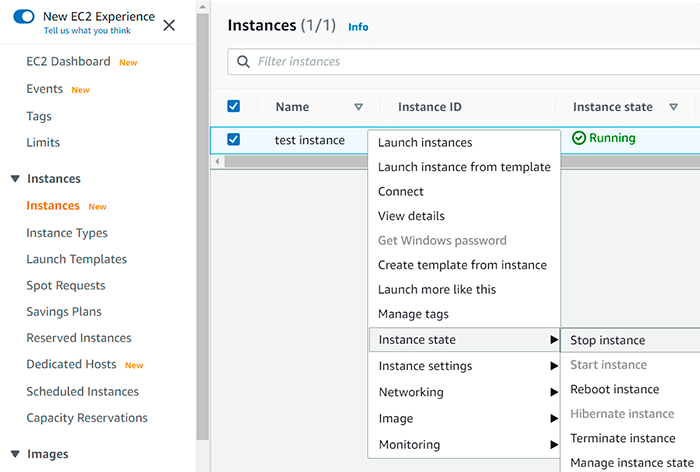
Expand the bottom pane and switch to the «Storage» tab, so you see a link to the instance`s volume at the bottom of the page 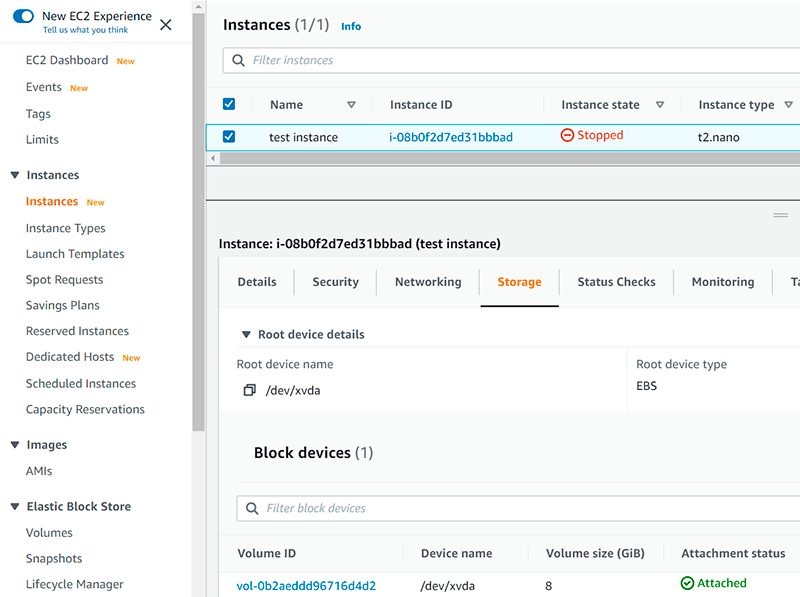
Click on it and you will notice that volume is not encrypted, so you have to right-click and select «Create snapshot» Provide a name and a description to easily find the snapshot and click «Create Snapshot» 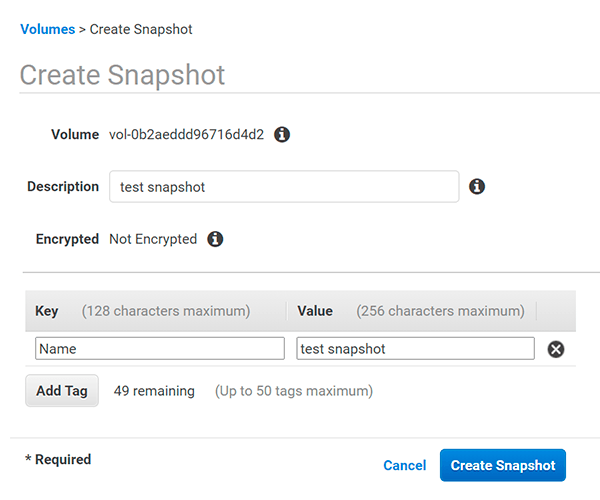
Navigate to snapshots, right-click on that one we created and select «Create Volume», notice that snapshot is not encrypted 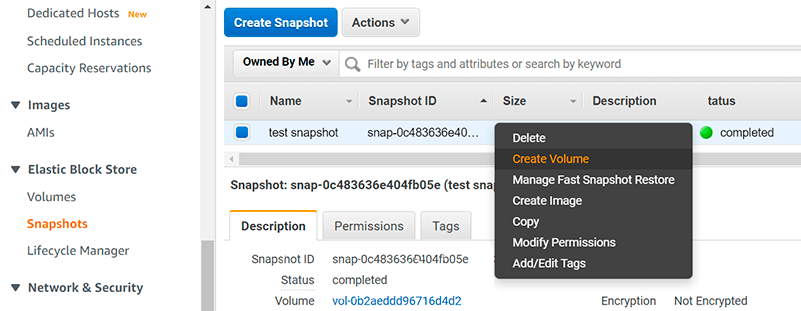
To create encrypted volume from an unencrypted snapshot, select the same availability zone and checkmark the appropriate checkbox and click «Create Volume» 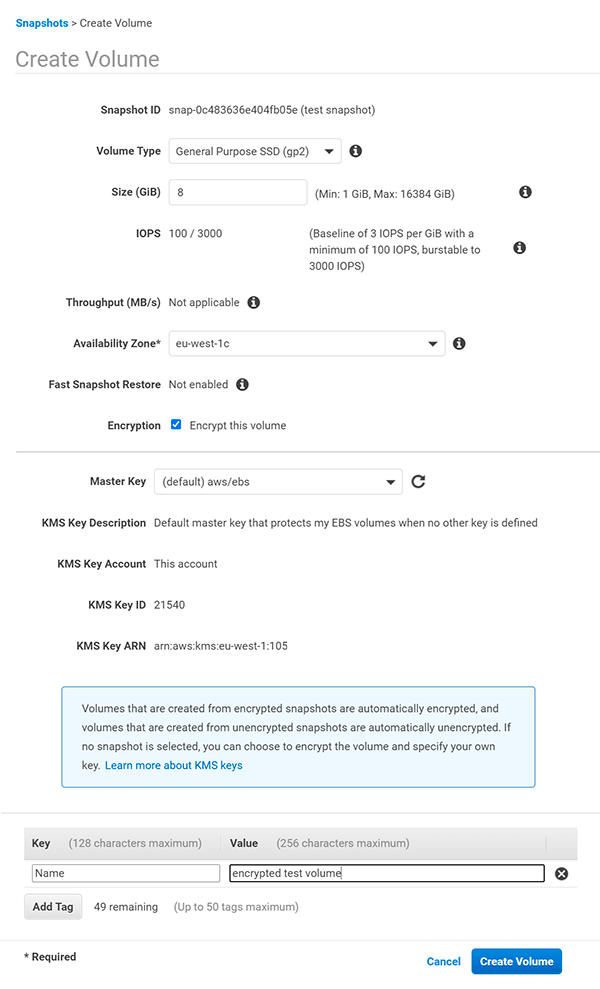
- Once we have a volume created, go back to EC2 instances section and locate your instance
- Write down current Device name attachement info, for Linux instances, it is usually /dev/xvda
- Click on the currently attached volume, so you will be sent to the volumes section again, but filtered out to show you only one volume, so you will not misclick and disconnect a volume from another instance
Right-click on the volume and click «Detach Volume» 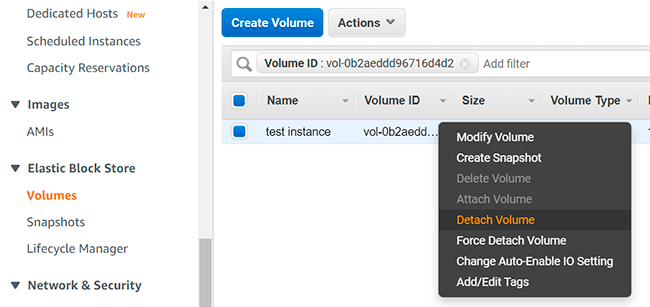
Right-click on encrypted volume and select «Attach Volume», notice it is encrypted 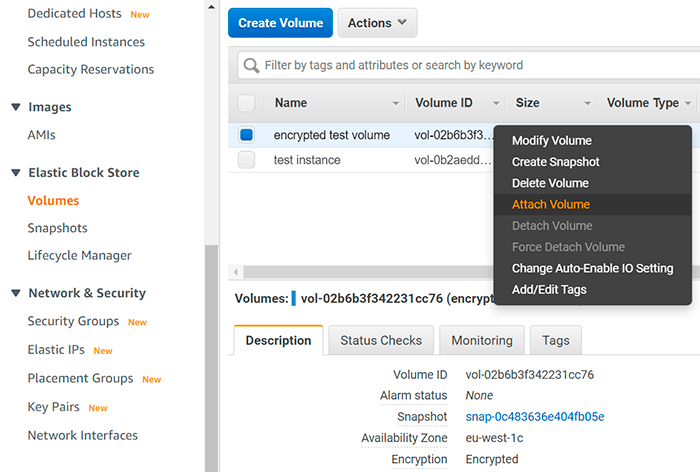
Provide instance id you are attaching the volume to and the device name (you noted on step 15) and click attach 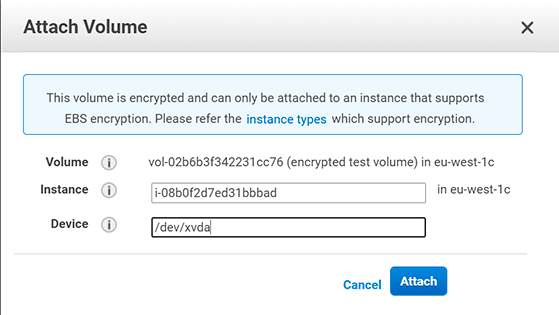
That`s it, later you can remove unencrypted volume and snapshot. For related automation work, see the PowerShell one-liners cheat sheet and the PowerShell in Docker guide.