How to create a custom ESXi image
Creating a custom ESXi image can be a valuable way to streamline and optimize your virtualization environment. With a custom image, you can incorporate the necessary drivers, applications, and configurations to ensure that your environment runs smoothly and efficiently. In this guide, we will explore the steps required to create a custom ESXi image and configure it to meet your specific needs. Whether you are looking to enhance your existing infrastructure or are setting up a new virtualization environment, understanding how to create a custom ESXi image is a must-have skill for any IT professional.
2026 note: VMware downloads moved from Customer Connect into the Broadcom Support Portal, including OEM custom images and add-ons. For vSphere 7 and newer, also check whether a vSphere Lifecycle Manager desired image is a cleaner fit than rebuilding a custom ISO manually.
You will need 30 minutes to follow these steps:
Go to the Broadcom guidance for VMware vSphere OEM custom images and download your vendor-specific image 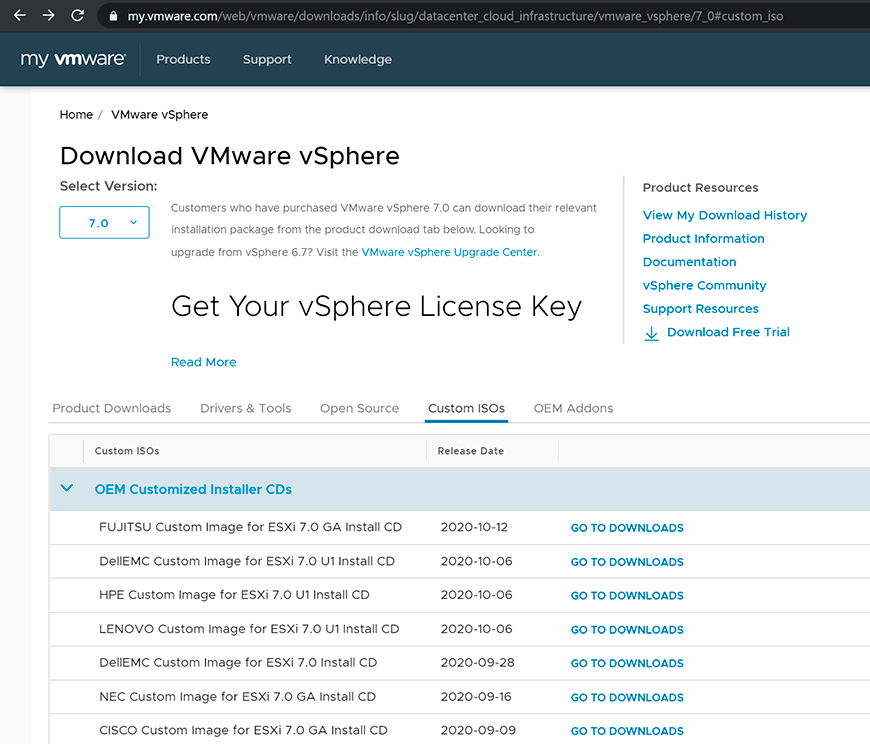
Switch to the drivers or add-ons area for your vSphere version and download required, additional, or updated drivers if needed 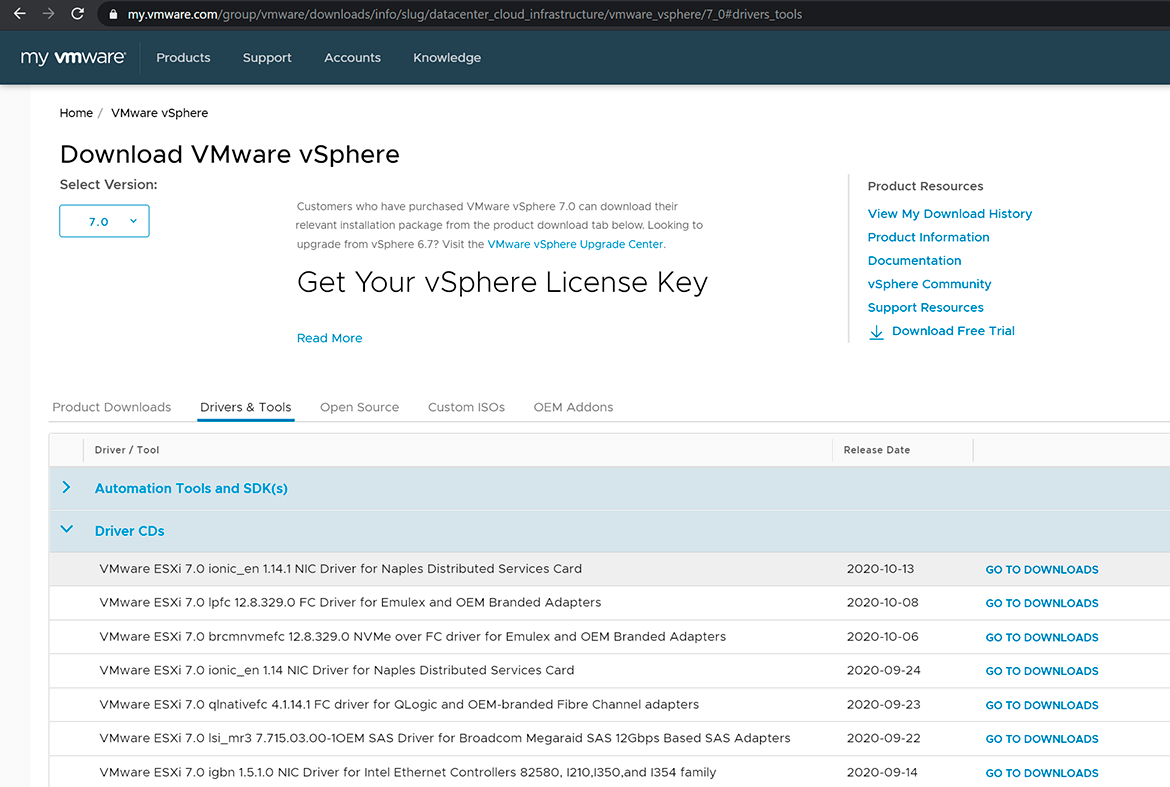
Go to VMWare patches and download latest ESXi build 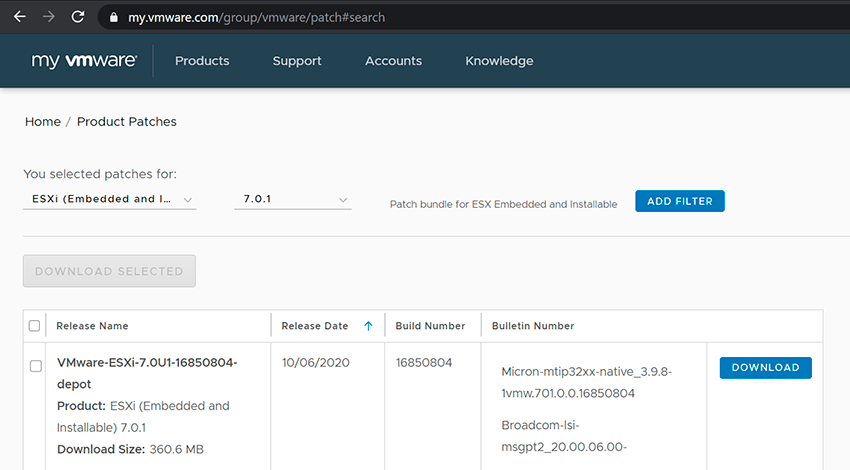
Go to your server`s vendor drivers download page, in my case Cisco drivers and download latest drivers for your ESXi version 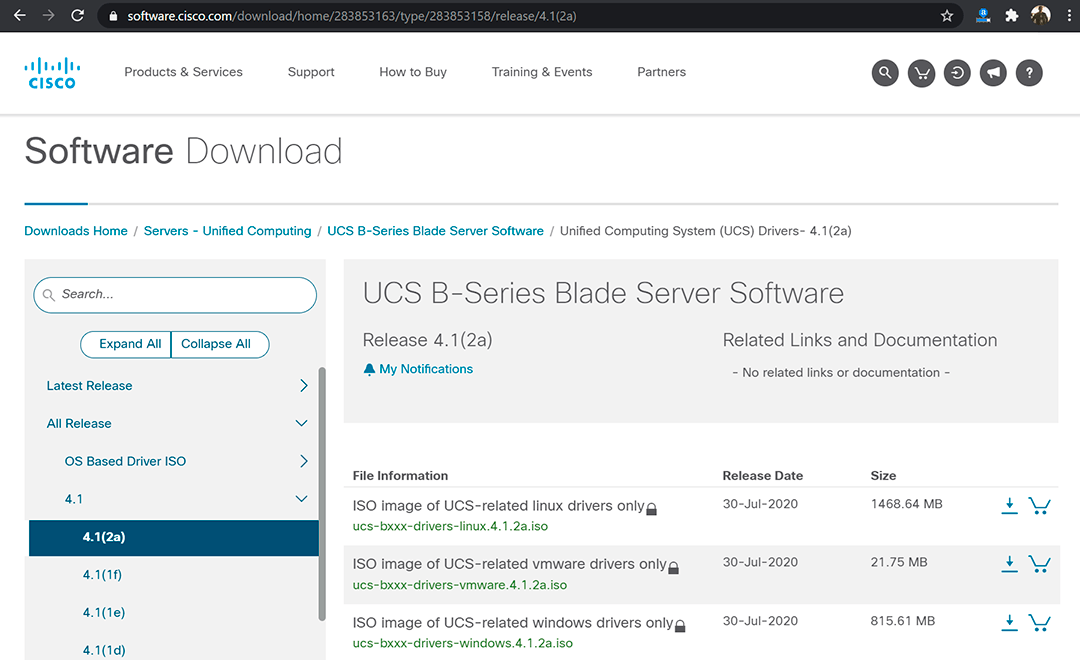
Go to your vCenter AutoDeploy menu section, click the Import link on the top right, locate a vendor-customized image and provide a name 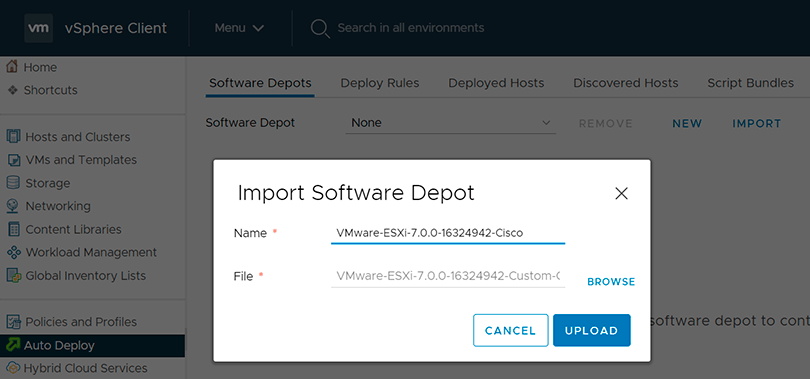
Repeat the previous step and import the latest ESXi build and drivers 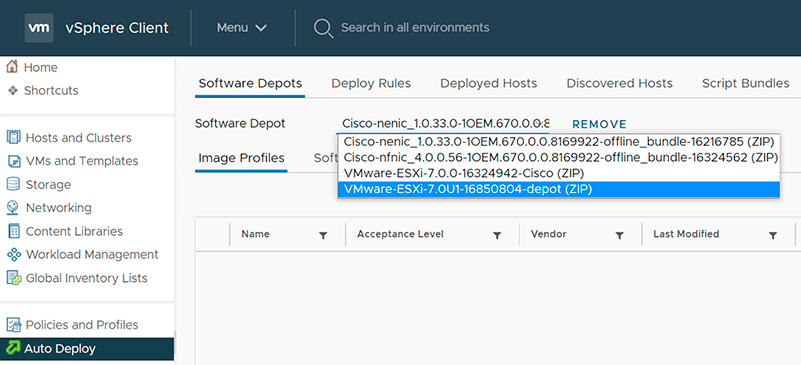
Add custom depot 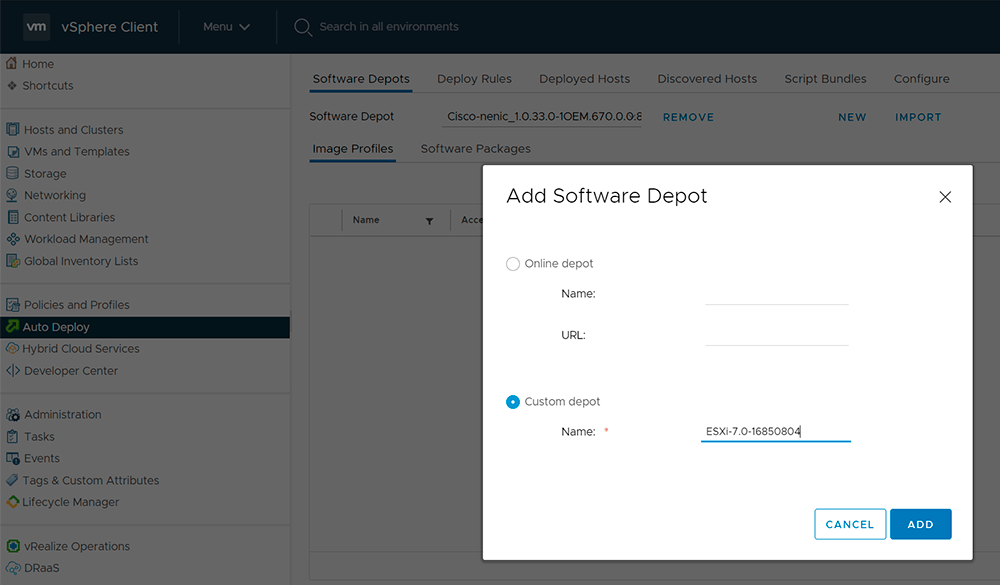
Click on the link `New image profile` and provide name and details.
I usually use the following naming convention: ESXi-[major_version].[minor_version]-[build]-[standard/no-tools]. The last part depends on whenever I include VMTools or no.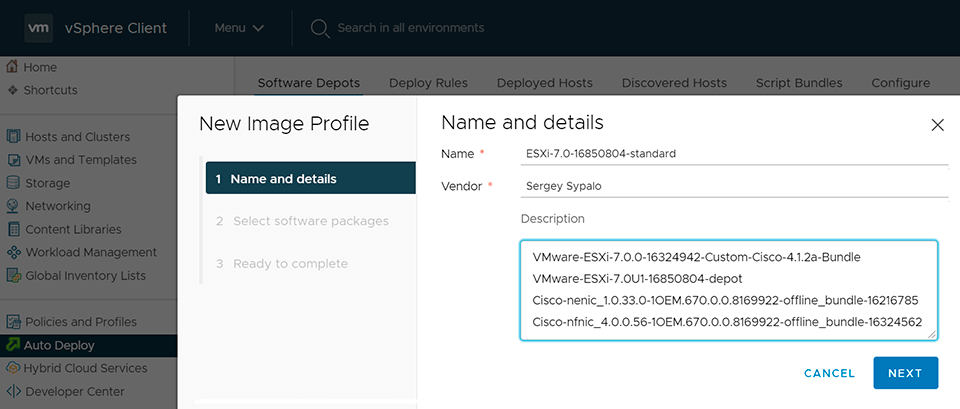
Select only the latest packages as by default wizard shows you a list with all available vibs from all depots 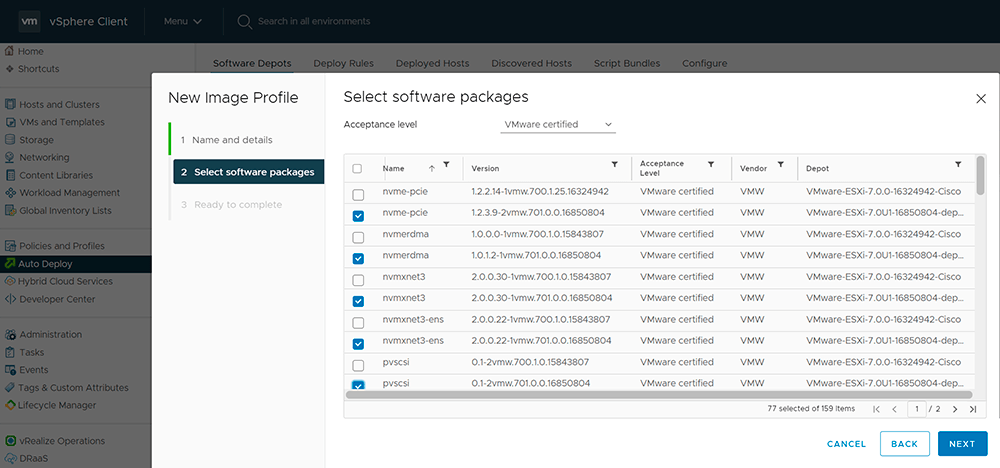
Custom ESXi image has been created and now you can use it in AutoDeploy or export to zip or ISO by clicking the Export button 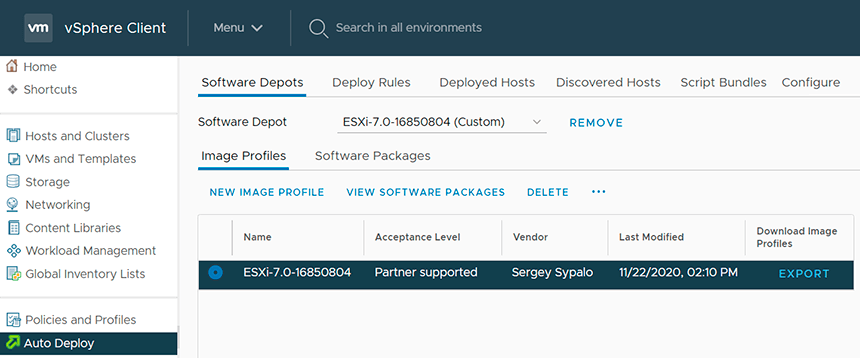
That`s all, we built an ESXi image we need with specified drivers. For related infrastructure maintenance, see the EBS encryption walkthrough and the PowerShell in Docker guide.